
You have probably noticed over the past few years that many of your favorite websites have moved from HTTP addresses to HTTPS. The added letter, while adding very little time and effort to type, adds immense value and security to those websites. Not only will having a WordPress HTTPS site make your business more trustworthy to visitors, but it will also rank higher in searches.
What is HTTPS?
If HTTP stands for hypertext transfer protocol. HTTPS stands for hypertext transfer protocol secure. The Mozilla Developer Network (MDN) has a fantastic, straightforward definition for the protocol:
HTTPS (HTTP Secure) is an encrypted version of the HTTP protocol. It usually uses SSL or TLS to encrypt all communication between a client and a server. This secure connection allows clients to safely exchange sensitive data with a server, for example for banking activities or online shopping.
If you have heard of end-to-end encryption, this is that. Only the two clients involved in the transaction can read the data. Anyone who might intercept it will see a garbled mess of characters that are theoretically uncrackable.
Sounds pretty good, right? So how does one get this digital force field? Via SSL.
What is SSL?
SSL stands for secure sockets layer, and once again the MDN can explain it better than pretty much anyone out there:
[SSL] is a protocol used by applications to communicate securely across a network, preventing tampering with and eavesdropping on email, web browsing, messaging, and other protocols.
All modern browsers support the TLS protocol, requiring the server to provide a valid digital certificate confirming its identity in order to establish a secure connection. It is possible for both the client and server to mutually authenticate each other if both parties provide their own individual digital certificates.
These certificates were once incredibly expensive and out of reach for pretty much everyone but the biggest websites. You’d see the green lock on sites like Amazon and Twitter, but everyday, run-of-the-mill WordPress sites (like most of ours) couldn’t pay the thousands of dollars it cost to purchase the certificate.

Lucky for all of us, as SSL certificates have become more necessary for both ranking and actually conducting business, the price has not only dropped but outright vanished for the majority of sites. There are a number of services now that offer free SSL certificates, including most hosts. You can get a WordPress SSL certificate pretty easily and without much hassle.
How to Get a Free WordPress SSL Certificate
Subscribe To Our Youtube Channel
The primary provider of free SSL certificates these days come from a service called Let’s Encrypt.
By using their services, you get all of the benefits of having an SSL certificate without spending a single penny. And here’s the best part: Most major hosting providers are partnering up with Let’s Encrypt to make installing an SSL certificate totally painless.
You can get a free SSL certificate from Let’s Encrypt in one of two ways.
Option 1. Install Your Free SSL Certificate from Your (Supported) Host Account
As I mentioned, many hosts are partnering up with Let’s Encrypt to add free SSL certificates directly inside their customers’ cPanel dashboards or the host’s dashboard itself. For example, if you’re hosting at SiteGround (as I am), you can install an SSL certificate in about two seconds. From the main login site, go into the My Accounts tab and into Extra Services. You should see a section called Let’s Encrypt Certificates, and you can manage and install them wherever you want by clicking the View All button.
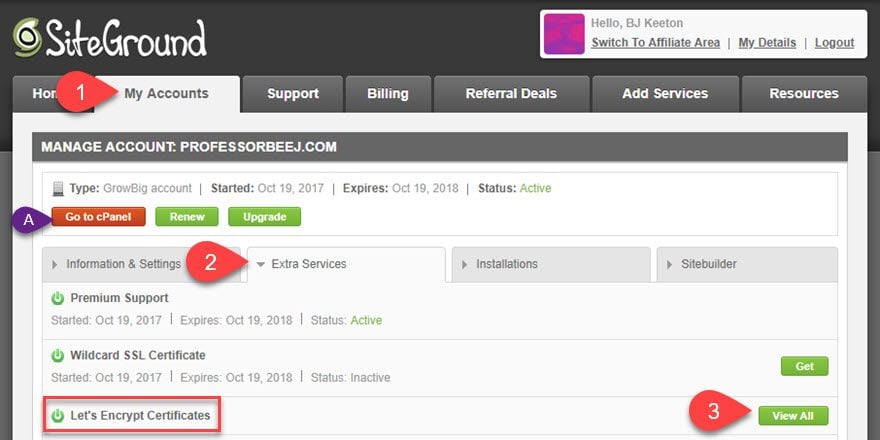
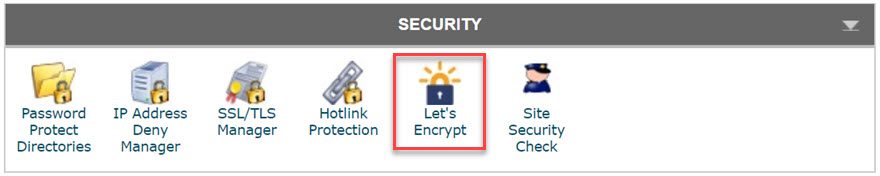
Additionally, you can click on the Go to cPanel button and find the Let’s Encrypt logo under the Security heading. It takes you to the same page as View All does.
From there, you will see a list of all your installed certificates. If this is your first time through, you won’t see any. You should, however, see something like this:
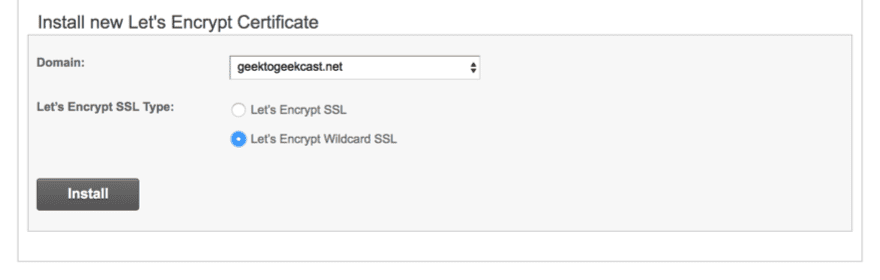
Whether you install a Wildcard (for all subdomains on the parent) or not, when you press the Install button, your WordPress SSL certificate is on its way.
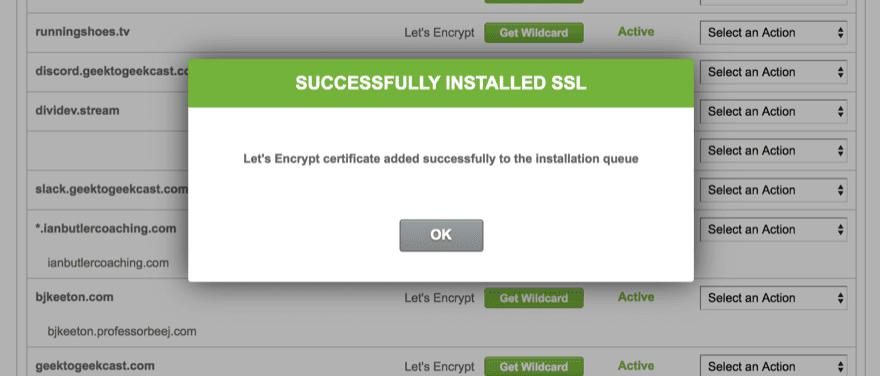
The server will process your new WordPress SSL certificate installation. Easy peasy. You are almost done. We still need to configure it, though. Which is below in the next section.
Also, read through this full list of web hosts who offer direct support for Let’s Encrypt. The process for most supported hosts should be similar to SiteGround. Additionally, some hosts may charge you for using Let’s Encrypt. It’s kind of a bogus charge, honestly, and many hosts who charge are nixing the fee as Google makes SSL the web standard. If yours doesn’t offer it for free, it may be time to consider a different host because they do not have your best interests in mind.
Option 2. Use “SSL For Free” to Manually Configure Your Let’s Encrypt Certificate
If your host doesn’t support Let’s Encrypt, you may still be able to get your free SSL certificate by using a website called SSL For Free.
The site will help you configure Let’s Encrypt certificates. But, you will need access to your site’s FTP details and potentially support from your host. While this method works, it’s very hands-on, and you may have to manually renew your certificate when it expires. Because of that, you should try to find a host that offers direct Let’s Encrypt support because it greatly simplifies the process. If you can’t for one reason or another, SSL For Free is your best second option.
Additionally, you can get free SSL certs from both Cloudflare and FreeSSL. Cloudflare offers a shared SSL certificate on their free plan. If you’re already using Cloudflare, this is a great way to get your site up and running with HTTPS. Then there’s FreeSSL . While it’s not publicly available yet, this is a free SSL certificate project from Symantec. Nonprofits or startups can get FreeSSL right now. Otherwise, you can sign up to be notified when it goes public.
If you choose to go this route and manually install the certificate, Sucuri has a fantastic guide that will take youstep-by-step through the installation process. Keep in mind, though, manually installing SSL will require you to use the command line, edit WordPress Core files, and work with CRON jobs. If that doesn’t sound like your idea of a fun day at work, let me refer you back to Option 1 above.
How to Configure Your Free SSL Certificate With WordPress
No matter which way you choose to get the certificate, once it is installed, users will be able to view a secure version of your site by going to https://yoursite.com. But just because your WordPress HTTPS connection is active doesn’t mean you’re finished. (But you almost are.)
To properly configure WordPress HTTPS to work with your SSL certificate, you need to make some changes. You can do this manually…or you could use an awesome plugin that does everything for you. It’s called Really Simple SSL, and it lives up to its name.
The plugin handles the whole process. Just install it and activate it. Be aware – you will naturally get signed out of WordPress when you run the plugin for the first time. This is because the plugin changes your default URL from “http://” to “https://.” All you need to do is log in again with your normal login credentials. No need to be alarmed!
Once you are logged back in, you’ll see that the plugin has already made the necessary changes. The default options are often good enough. You find them under Settings – SSL.
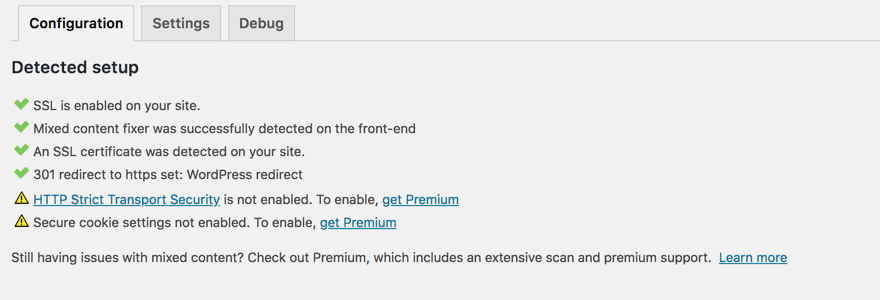
And if those aren’t good enough, and you want to tweak some more, the Settings tab is up top.
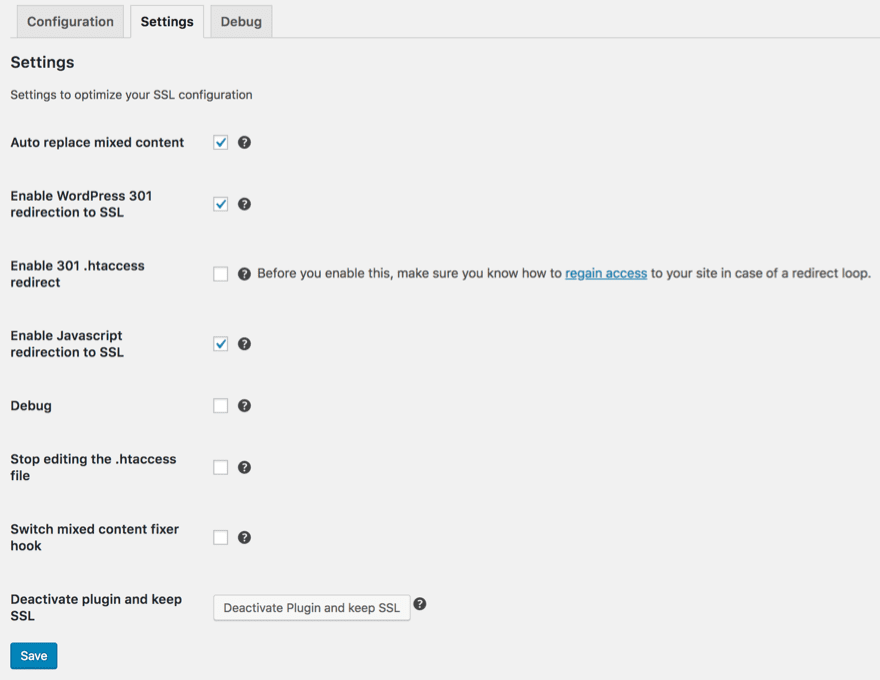
The option you will likely be most concerned with is the first one: auto replace mixed content. The box should be checked by default. If not, check it. Then save the page.
Now, you’re good to go. You have successfully installed and activated WordPress HTTPS and WordPress SSL. Congratulations!
Troubleshooting Common HTTPS/SSL Errors
Just because things are installed and ready doesn’t necessarily mean they’re working smoothly. You may run into a few issues on your site. WordPress HTTPS sites are easy to troubleshoot, though. Let’s walk through the solutions to some of the most common issues.
At some point, after you set up SSL on your site and move to WordPress HTTPS, you might end up seeing some broken images on your site. Images and content that once appeared perfectly on your site may not show as though they don’t exist. Don’t worry. You didn’t do anything wrong. Your site just thinks that those images are insecure (they’re not), so you want to make sure that the WordPress SSL is set up to display mixed content.
Two different types of mixed website content exist. One is known as mixed active content and results when HTTPS loads a script on top of HTTP. This is a big no-no but is not what is going on here. The other type of mixed content is known as mixed display content and is when content using an HTTP connection is loaded to an HTTPS site. While you may not have actively loaded any images to your website using HTTP, there was something inside of WordPress that caused them to be recognized as such.
Basically, something on your website didn’t like that you went to HTTPS and is automatically forcing HTTP on them instead. Which renders them…well, it doesn’t render them. So let’s fix that.
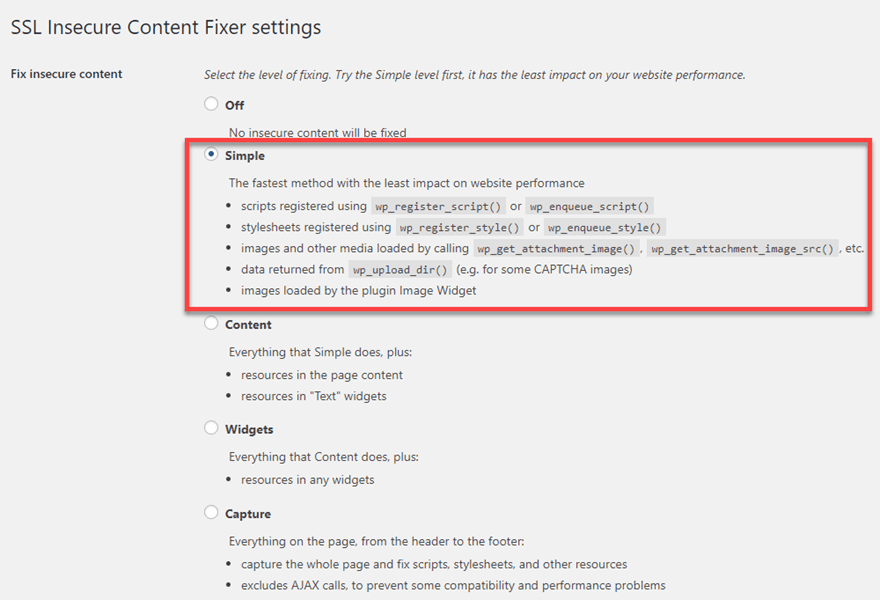
The first and most consistent way to address mixed display content is to use the WordPress SSL Insecure Content Fixer plugin.
Whenever you install and activate the plugin, your mixed content error may go away immediately. By default, the plugin will be set to the Simple ruleset within its settings (found under Settings – SSL Insecure Content in your WP admin panel). You can adjust how stringent the rules it follows are, all the way down to forcing HTTPS on all AJAX calls, but most of the time, Simple will work just fine. In my experience with this particular issue, Simple has worked each and every time. But your mileage may vary.
If You’re Still Displaying Mixed Content
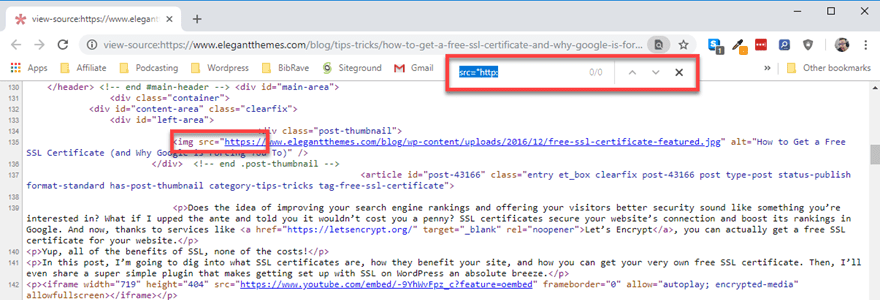
Open up your website, right-click and select View Page Source or hit CTRL/CMD – U. You will see the source code of the page you’re looking at. At this point, hit CTRL/CMD – F and do a search for src="http. Yes, with only one quote. You’re good and can move on if you see 0.0.
If you do get any results returned, that means that the site is pulling from an HTTP source, not HTTPS. To fix that, you need to dig into your database (but this one’s easy and anyone can do it).
The Better Search and Replace plugin basically lets you work in your database via the WordPress admin panel. You don’t have to deal with any SQL or PHP or anything else. It’s a standard WordPress page that works like a typical find and replace you’ve probably used a dozen times in word processors.
We have a full guide to the plugin that you can read here, but the breakdown for fixing your WordPress SSL mixed content error is pretty straightforward, too.
- Download, install, and activate the plugin
- Make a backup of your site
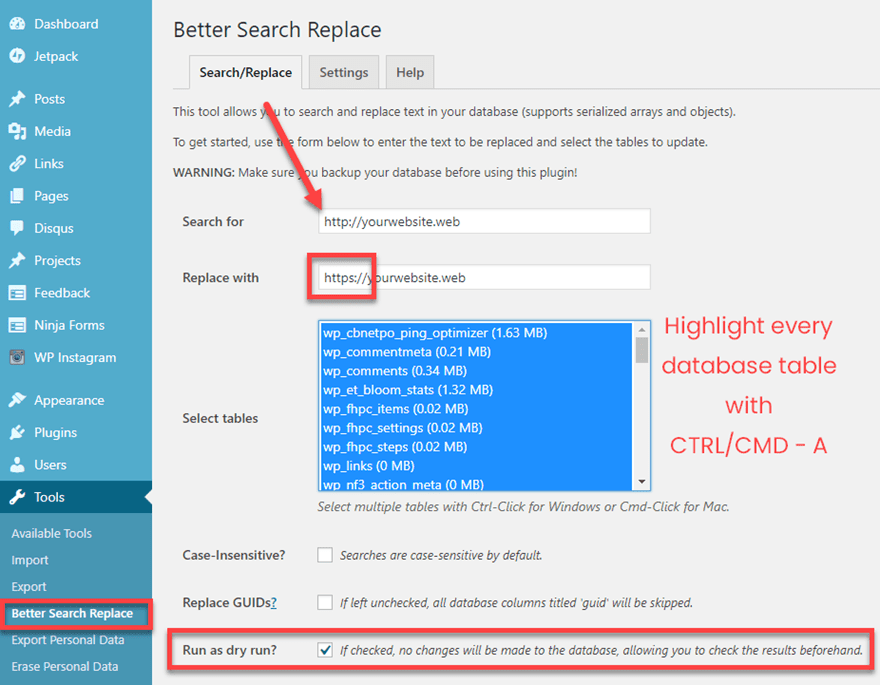
- Navigate to Tools – Better Search Replace in your WordPress database
- In the Search for field, enter the URL to your website with http:// at the beginning
- In the Replace with field, enter the URL to your website with https:// instead
- Highlight every table in the database with CTRL/CMD – A
- Ensure that Run as dry run? is checked. Doing so you ensure any errors don’t break your site and can be fixed beforehand
- Press the Run Search/Replace
If everything goes as planned, the dry run will show that your search and replace will be successful and you can run it for real.

Redirecting HTTP to HTTPS
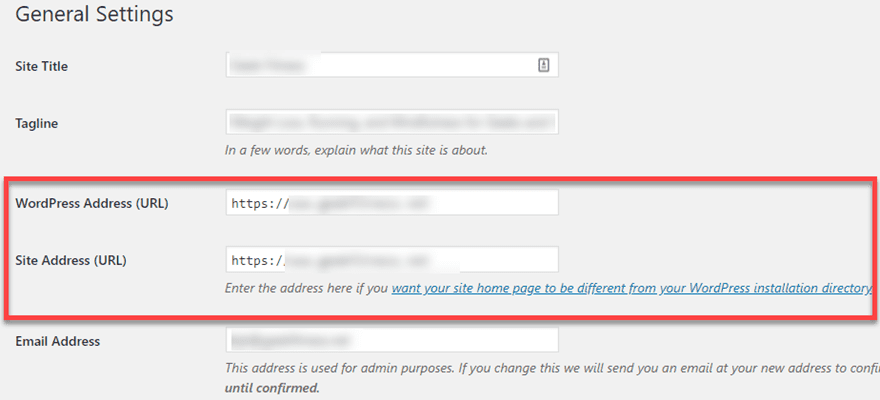
Now, that should have fixed your mixed display content issues. However, you still probably want to make sure that your site is as HTTPS as possible to prevent any other issues. One such issue is when a site has a backlink to the HTTP version of your site, but you’re actually running the new, improved HTTPS version. They technically count as two sites, and their old link could show up as insecure to some users. So the next step is to check your Settings – General options. Make sure that your site address is set to HTTPS. If not, then do that and hit save. (The site will log you out. That’s okay.)
After that, you will need to get into your FTP client and open up your .htaccess file. It will be located in the root directory for your WordPress installation.
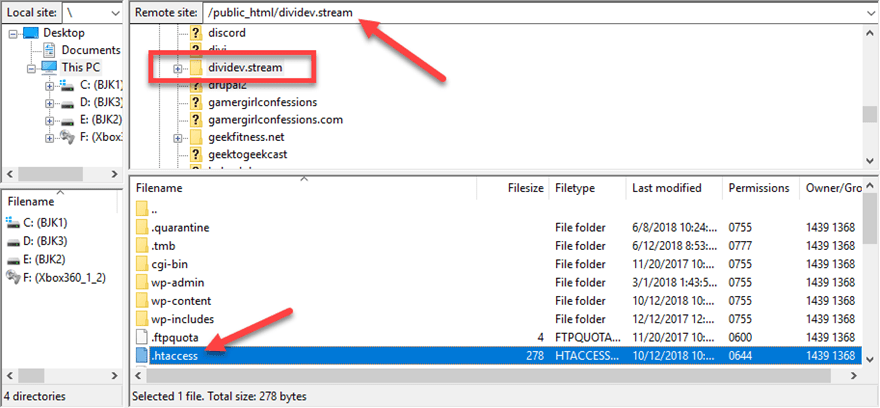
You will want to download a copy of this as a backup, then open it up in your favorite code editor (mine is Sublime Text). At the very top of the file (not between the # BEGIN/END WordPress tags), add the following code. (Thanks to Dreamhost for the code itself.)
RewriteEngine On |
RewriteCond %{HTTPS} !=on |
RewriteRule ^(.*)$ https://%{HTTP_HOST}%{REQUEST_URI} [L,R=301] |
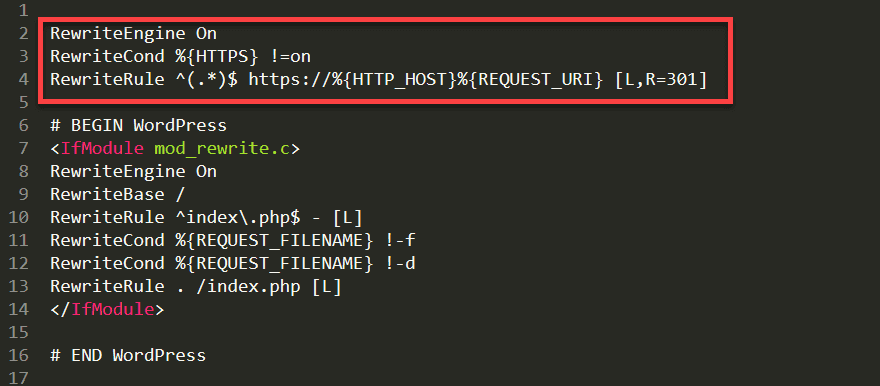
That will redirect your old HTTP URLs to the HTTPS versions as your website loads. Note that in the code you’re putting [L, R=301], that’s a permanent 301 redirect through the .htaccess file. You won’t need a 301 redirect plugin if you do this. At least for the primary domain.
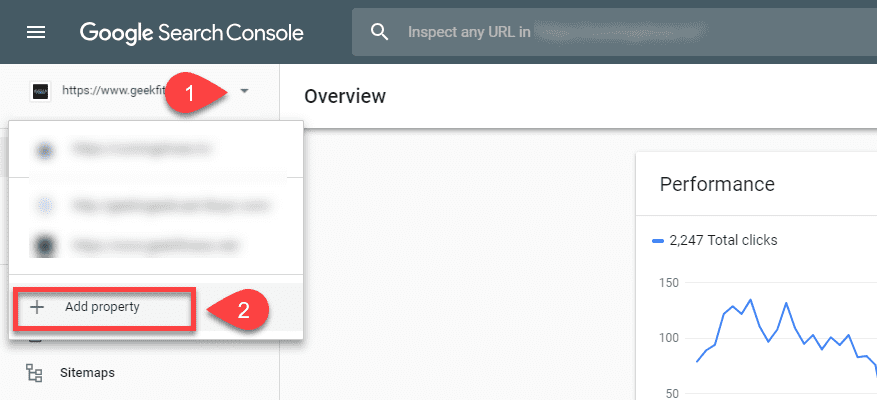
Now, remember when I said they count as two sites? This fixes that. You have given the new WordPress HTTPS site all the link-juice and search ranking your HTTP site had. Now, make sure you keep it by telling Big Daddy G (that’s my pet name for Google these days) that you’ve moved into a safer, more secure location. Now, it’s time to load up the Google Search Console.
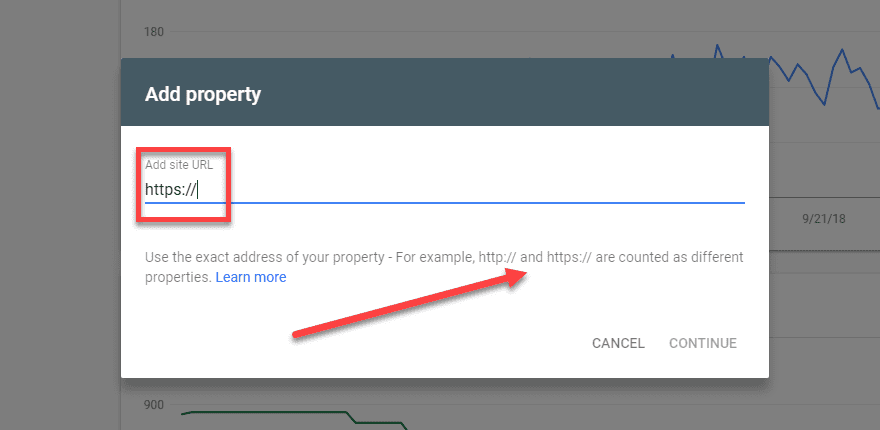
Even if you already have the HTTP version of your site registered with the Google Search Console, add the new WordPress HTTPS site as a new property.
The Search Console will pop up a modal asking for the full URL of the site. This is where you must make sure to enter the HTTPS version. Note that even the modal tells you they are separate properties, just so that you are aware of how important this step is.
Then you will go through the process of verifying the property as usual. When you’re done with that, Google will be aware that you’ve locked your site up from prying eyes.
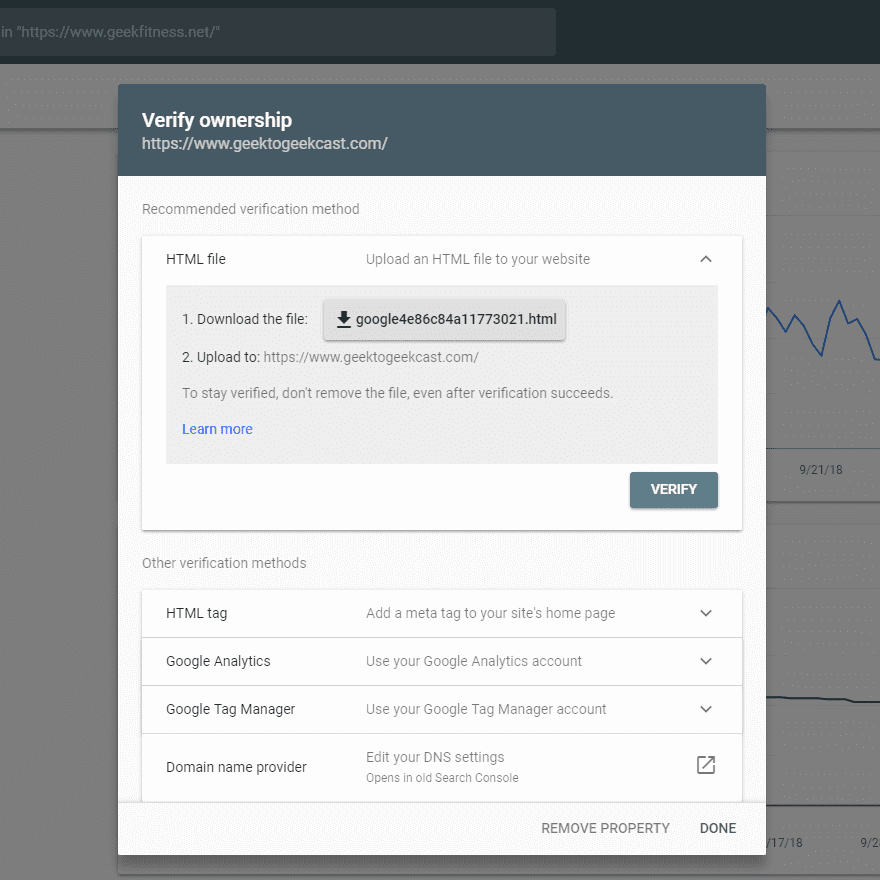
Once you’re verified with Google, and you’ve set up the Search Console with your new property, welcome to your new WordPress HTTPS site. You should be free and clear of errors that you can handle yourself.
WordPress SSL Errors with Plugins and Themes
If you still have errors at this point, there’s a good chance that it’s out of your hands. Either an active plugin or your theme is the most likely culprit. To see which it may be, right-click on your page and select Inspect from the menu. You can also hit CTRL-SHIFT-I to open the developer tools. Look around until you see the tab labeled Console. If there are errors, you will see them highlighted in red.
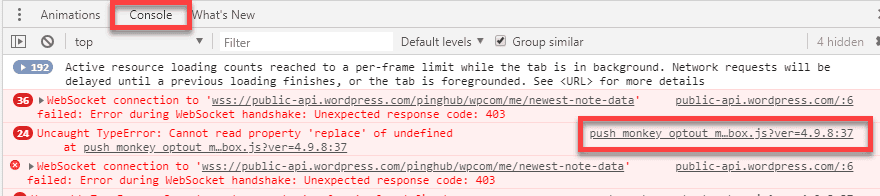
As you look at the errors, you will be able to see what kind they are. If there are any labeled as Mixed Content, you can look at the provided file URL to see what part of your installation is responsible. You can easily identify it. It will either be your theme or a plugin from the error’s output.
Now, since you know what’s causing the error. The best thing you can do is report it to the plugin or theme author. Many have support forums or live-chat teams for just this reason. I recommend that you report it to the authors for a couple of reasons.
The first being that messing around in plugin and theme files can get pretty nasty. Especially if you’re not a developer yourself. While you can tweak theme files much more easily thanks to child themes, you still have the chance of breaking something important you may be unaware of. And when it comes to plugins…well, we never suggest poking around in plugin files. It can get even nastier than the themes sometimes.
The second reason being that you are not alone in this problem. You have it. Other people have it, too. That’s how these things work. So the developer needs to know about it and provide a fix via an update. So not only have you helped yourself with a problem, you’ve contributed to the greater good and can feel pretty darn good about yourself.
Invalid Certificate Warnings
Occasionally, a user may tell you that that your site is showing either an invalid certificate or an expired certificate. This is not a big deal. It’s an easy fix. In general, to fix an expired certificate (or to renew one), you just need to go through the steps in the section above titled “Install Your Free SSL Certificate from Your (Supported) Host Account.” In most cases, that will work. If it does not, make sure you install the Wildcard Certificate because you may be getting the error because of a mismatched domain name.
If that doesn’t work, contact your host. As I said earlier, I am personally on SiteGround. And when I had this issue with my SSL not automatically renewing, the support team had it fixed within half an hour. That will obviously change host to host, but they want your site online almost as much as you do.
“Too Many Redirects” Error
And just in case the 301 redirect in your .htaccess file doesn’t keep this at bay (it should), you might occasionally get the error where your site gets stuck in an endless loop between your HTTP site and your HTTPS site. Luckily, this is almost as easy a fix as the invalid certificate. You just need to open your FTP client and find your wp-config.php file in the same folder your .htaccess was in. Open this one up in your favorite code editor, too. Add the following code to the bottom of the file:
/** Prevent Too Many Redirects Loop **/ |
define('WP_HOME','https://mywebsite.com'); |
define('WP_SITEURL','https://mywebsite.com'); |
$_SERVER['HTTPS'] = 'on'; |

Save and upload it back to the server. Your site should now stop where it is supposed to.
Wrapping Up with WordPress HTTPS and SSL
I know that’s a lot to take in. But WordPress HTTPS is really important for your site’s viability in the future. Users trust you more. And maybe more importantly, Google will trust you more, too. You’re now set to fix mixed content errors, handle SSL certificate expiration and renewal, edit your .htaccess and wp-config.php files, and even futz around with your site’s database. At this point, you have locked your site down. When something breaks with the WordPress SSL, you can fix it. Pat yourself on the back, go have a drink, and rest well knowing that your site is safe and sound.
Source: Elegentthemes
Leave a Reply